Technical Resource · Reviewed July 22, 2026
Water vapor fireplace installation guide: power, water, access, and commissioning
A built-in water vapor fireplace is easier to coordinate than a chimney-based fire, but it is not a decorative object that can be dropped into any finished opening. The unit still needs the correct electrical supply, a deliberate water strategy, free mist airflow, structural support, service access, and a documented handover. This guide gives designers, contractors, hotel engineers, distributors, and owners a decision sequence they can use before the wall is closed.
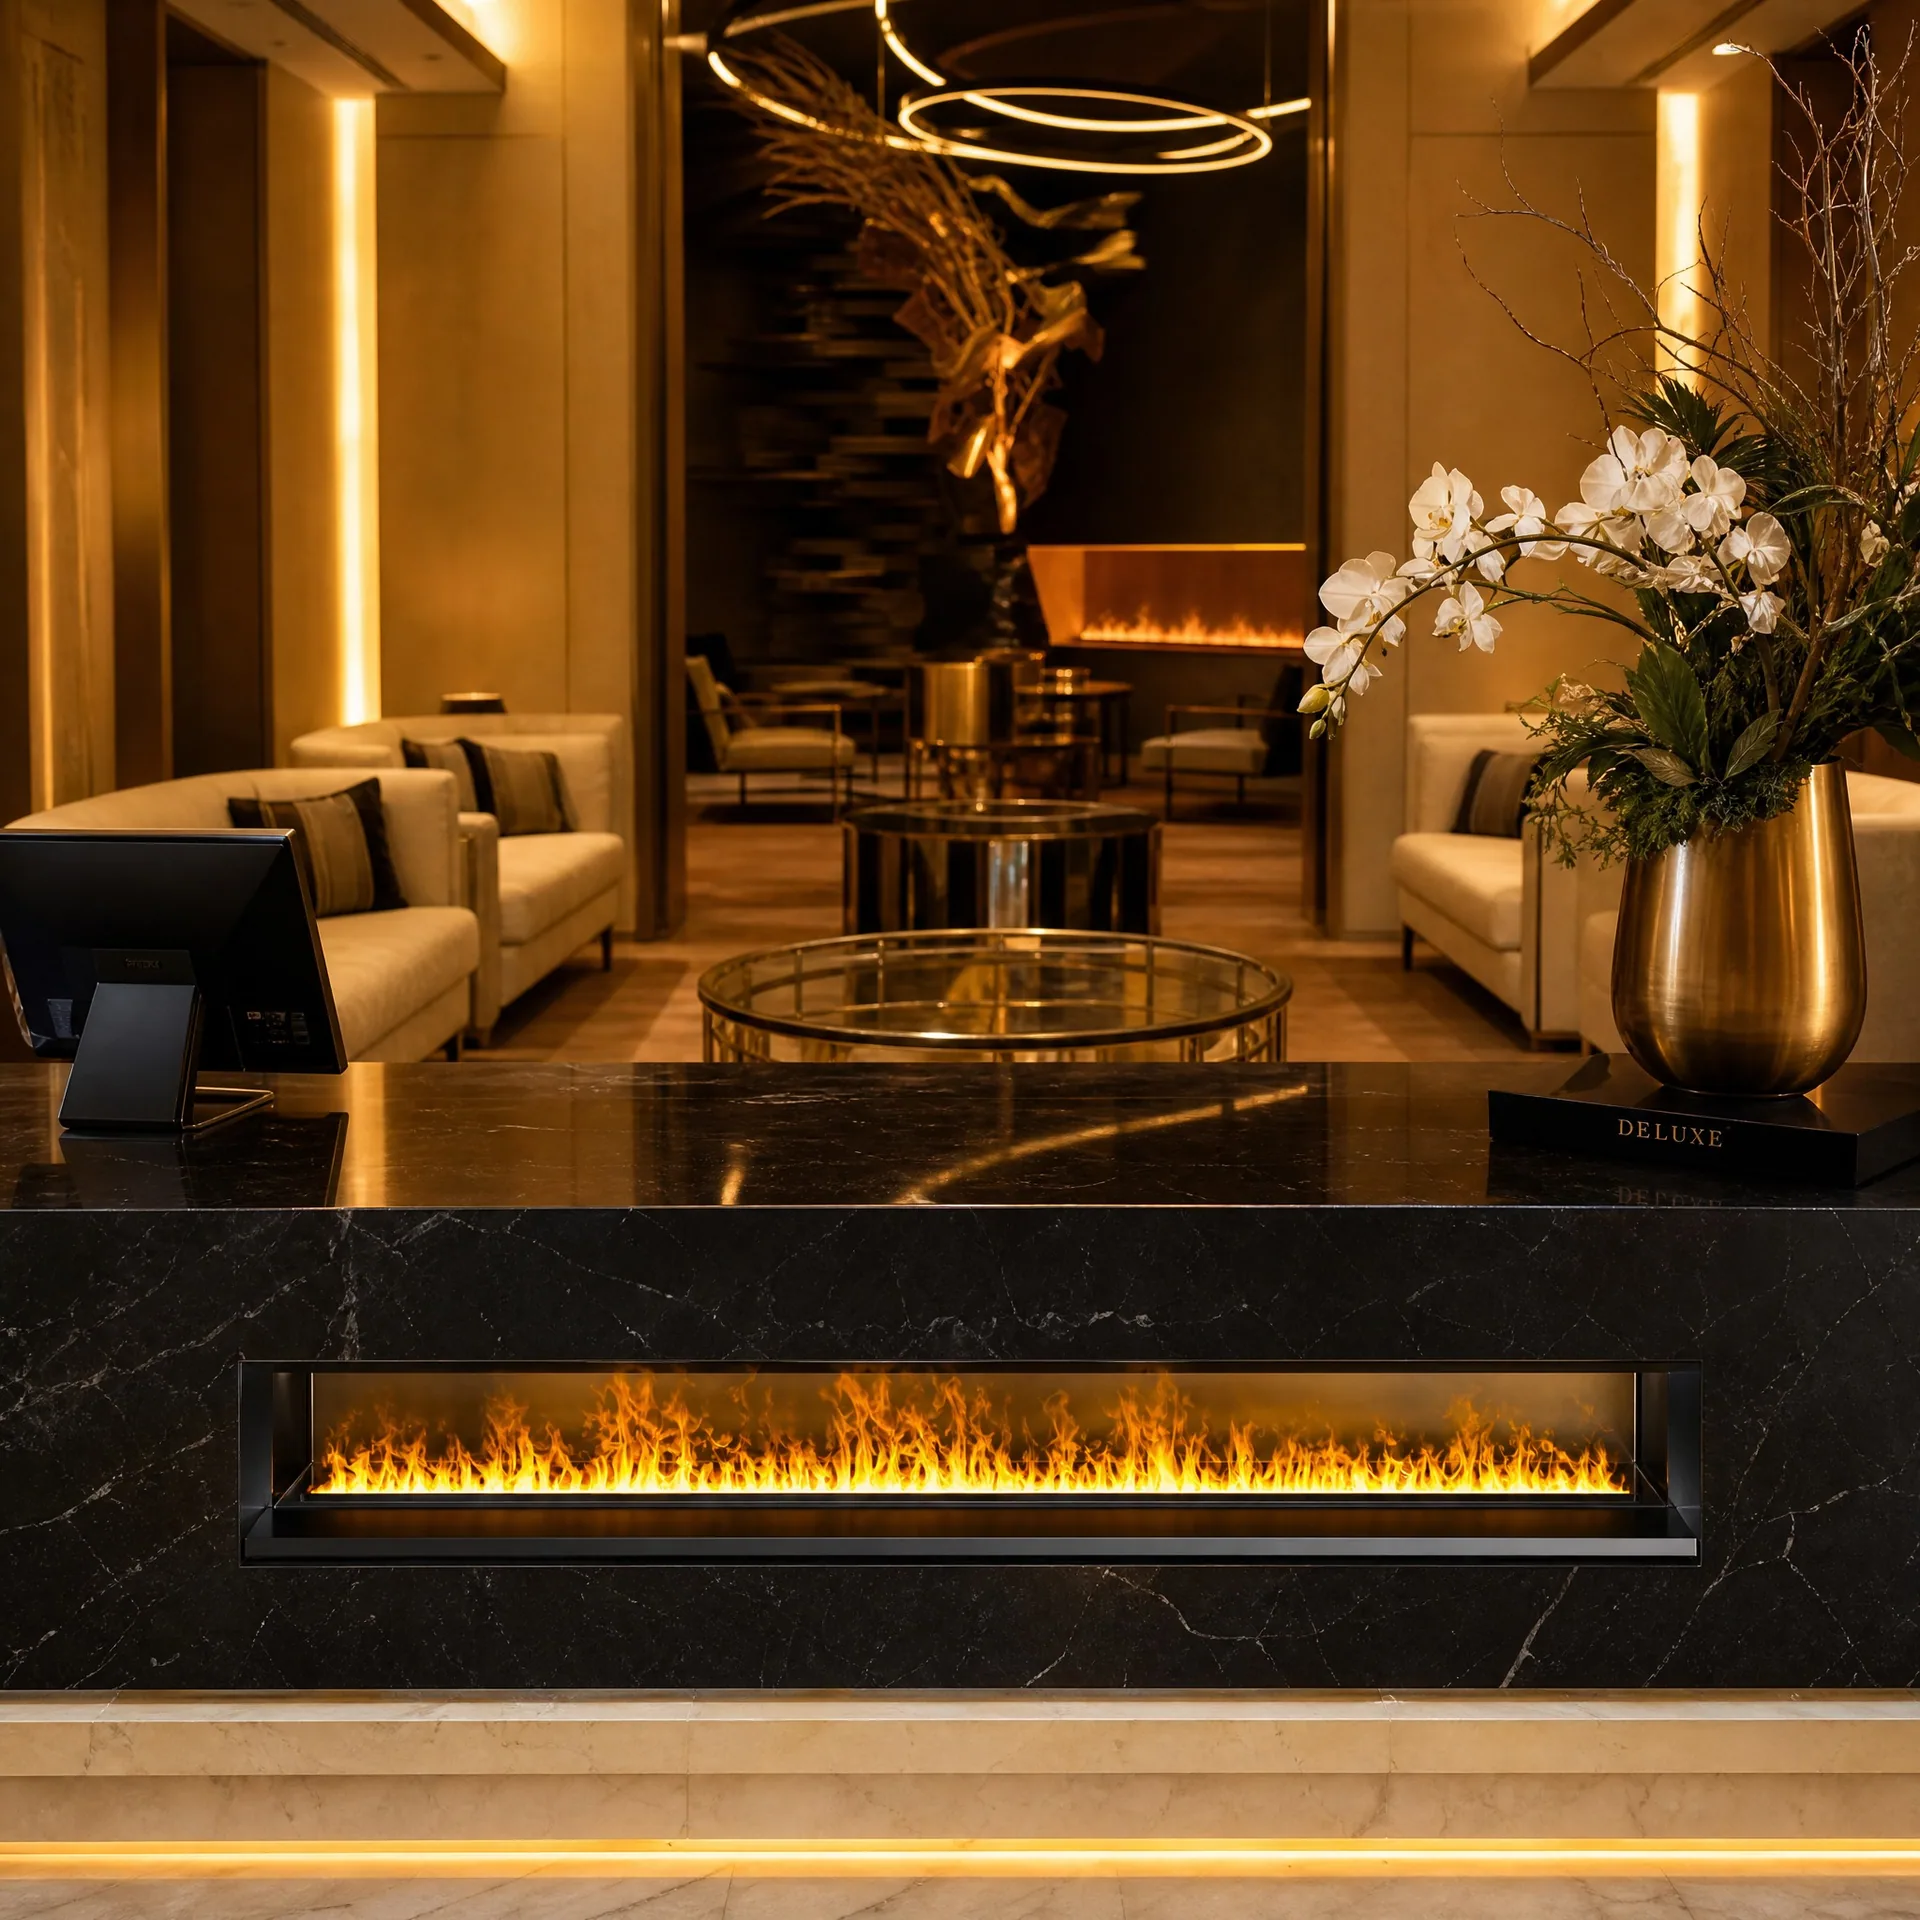
Evidence boundary: this is a planning guide, not an installation manual. Dimensions, electrical ratings, plumbing interfaces, clearances, outdoor suitability, and included accessories must be taken from the exact quoted model, approved drawing, delivered manual, and local requirements. Where this page discusses another manufacturer’s manual or public safety guidance, it does so only to illustrate common coordination principles—not to define a SEFIRE product.
Direct answer: what does a water vapor fireplace installation require?
At minimum, a built-in unit needs a level and adequately supported opening, the electrical supply specified for the exact model, unobstructed paths for air intake and mist discharge, access to fill and drain the reservoir, and enough removable space to inspect or replace serviceable parts. A manually filled system needs a realistic route for lifting out or reaching its tank. An automatic system additionally needs a planned cold-water route, accessible isolation valve, compatible filtration where required, leakage-conscious detailing, and any drain or discharge connection stated in its drawing.
The installation is successful only when those services remain usable after stone, joinery, glass, or metal finishes are complete. A beautiful opening that hides the power isolation point, traps the reservoir, blocks mist, or requires demolition for routine cleaning is not complete. The correct sequence is therefore: select the exact unit, obtain its drawing and manual, coordinate the wall and services around that information, preserve access, install, commission, and hand over a maintenance plan.
Start with the exact product, not a nominal flame length
Design teams often begin with a visual target such as “a 1.5-metre flame.” That is useful for concept work but insufficient for construction. Two products with a similar visible effect can differ in body length, depth, height, reservoir arrangement, power demand, airflow path, controls, and removal direction. Even products within one family can change in capacity and power as length increases.
SEFIRE’s locally verified editorial data lists Primary VSFB models from 750 to 2000 mm, with body dimensions of 750–2000 × 226 × 178 mm, tanks of 4.5–11.5 L, listed power of 200–760 W, and manual fill and drain. The Deluxe VSFB family extends from 750 to 2750 mm in 250 mm steps, with the same verified 226 × 178 mm cross-section, tanks of 4.5–30 L, listed power of 400–1298 W, and support for automatic fill and drain. These ranges help with early selection; they are not permission to build from a web summary. The approved model drawing remains the controlling construction reference.
Before issuing a wall detail, record the model code, overall body dimensions, intended viewing opening, finished material thickness, electrical rating, fill method, drain method, control method, and required access direction. If one of those items is unknown, label the drawing “for coordination only” rather than letting a preliminary detail become a fabrication instruction.
Installation decision table
| Decision | Manual-fill installation | Automatic-fill installation | Evidence to approve |
|---|---|---|---|
| Water provision | Safe route to remove or refill the reservoir | Cold-water route and compatible connection | Exact model drawing and manual |
| Isolation | Electrical isolation remains accessible | Electrical isolation plus accessible water shutoff | Electrical and plumbing coordination drawings |
| Drainage | Controlled emptying route for cleaning | Drain/discharge only if specified for the configuration | Quotation scope and approved connection detail |
| Maintenance | Tank, mist components, and surfaces can be reached | Valves, filters, sensors, tank, and mist components remain reachable | Service-access section and removal test |
| Best fit | Occasional use or projects without a water line | Frequent operation where daily manual filling is undesirable | Operating schedule and maintenance owner |
1. Coordinate the electrical supply
A mist fireplace uses electricity for lighting, atomization, controls, and—depending on the design—pumps or optional functions. Treat the nameplate and supplied manual as the source for voltage, frequency, rated power, plug or hard-wired arrangement, protective device, grounding, isolation, and circuit requirements. Do not infer the electrical design from the appearance of a showroom sample or from a different model in the same family.
SEFIRE’s verified editorial range is 110–220 V for the Primary and Deluxe VSFB families, but the ordered configuration must still be confirmed before site wiring is released. The longest Deluxe model has a higher listed maximum power than the shortest unit, so “all mist fireplaces use almost no power” is not a valid construction assumption. Ask a qualified local electrician to coordinate the exact load, local wiring rules, wet-location considerations, and safe isolation arrangement.
Place the connection where it is protected but accessible. A receptacle or junction point trapped beneath a permanently fixed appliance can turn a simple inspection into destructive work. Route cables away from sharp edges, pinch points, standing-water risk, and hot equipment belonging to another system. Keep controls and receivers where their signals and service access are not unintentionally blocked by metal cladding.
A permanent feature should not depend on an improvised extension lead. The U.S. Consumer Product Safety Commission notes that extension cords missing characteristics such as adequate wire size, strain relief, polarization, continuity, and suitable jacketing can present shock or fire hazards. That public guidance does not define the wiring rules for every country; it reinforces the project principle that the permanent supply should be planned and checked for the actual appliance.
2. Choose manual fill or automatic fill early
Manual fill is often the simpler choice for residences, display units, or spaces where the effect runs occasionally. It removes the need to bring a permanent water line into the feature. Simpler does not mean access-free: the operator needs a stable route to reach or remove the reservoir without damaging finishes, spilling water into electrical areas, or lifting an awkward container through a narrow decorative slot.
Automatic fill can reduce routine handling in hotel lobbies, restaurants, showrooms, and frequently used villas. Its value depends on correct infrastructure. A supply route added after the cabinetry is complete may be difficult to protect and harder to service. Define the connection side, pipe or tube route, pressure or treatment requirements stated by the manufacturer, isolation-valve position, filter access, and leakage response before fabrication.
Do not assume that “auto-fill” automatically includes a drain, filter, pressure regulator, leak sensor, or every fitting shown in a reference photograph. Confirm each item in the quotation and drawing. SEFIRE’s verified summary says the Deluxe family supports auto-fill and auto-drain; the final ordered configuration and accessory scope still control what is delivered.
3. Plan water quality as an operating condition
Ultrasonic mist systems repeatedly expose reservoirs and atomizing components to water. The correct water specification is product-specific, but local hardness is a useful maintenance input. Current U.S. EPA WaterSense guidance explains that hard water can form scale on fixtures, pipes, water heaters, and other appliances, increasing cleaning or replacement needs. A current Dimplex Opti-myst manual likewise allows normal tap water for its referenced model unless the supply is hard, in which case it recommends softened or filtered water. Neither source defines SEFIRE’s universal water requirement; together they show why the site team should not ignore hardness.
Ask what water the exact manual permits, whether filtration or treatment is required, and how often the reservoir and mist-producing parts should be inspected. Do not substitute deionized, distilled, softened, treated, fragranced, or chemically dosed water unless the exact product instructions permit it. A treatment that reduces one type of residue can introduce another compatibility issue.
For commercial projects, put the agreed water type in the facilities manual. “Use clean water” is too vague for a rotating maintenance team. Record the source, any filter model, replacement responsibility, cleaning trigger, and escalation path if mist output declines or deposits appear.
4. Treat drainage as maintenance infrastructure
Every reservoir eventually needs controlled emptying for cleaning, transport, winter shutdown where applicable, or service. A manual-drain installation should let staff move water without pouring it across finished joinery or electrical connections. An automatic-drain configuration needs the connection, route, fall, termination, trap or backflow provisions, and local plumbing review appropriate to the supplied design.
Never invent a drain connection from a product photo. Confirm whether the quoted unit has a drain port, pump, gravity discharge, removable tank, or another arrangement. Confirm what happens during a power interruption and whether any line needs isolation before service. If the feature is above sensitive finishes or occupied space, the designer should also consider a water-resistant base, visible inspection zone, or other leakage-management measures suitable for the building.
Outdoor and seasonal work needs extra caution. The local SEFIRE source does not establish an IP rating, frost tolerance, or universal weatherproof installation method for the round outdoor vapor family. Those points require project-specific documentation. Do not route water outdoors or expose a unit to rain based only on the word “outdoor” in a range name.
5. Preserve airflow and the visible mist path
The flame illusion depends on mist moving through light. Blocking the intake, crowding the discharge, or adding untested glass and trim can reduce the effect, cause condensation, or return moisture to areas not intended to receive it. The approved drawing should identify the required opening and any free-air zones. Decorative media must be the correct type, position, and quantity for the specific appliance.
Coordinate nearby air-conditioning diffusers, extraction grilles, doors, and strong cross-drafts. Moving air can bend or disperse a mist effect even when the appliance is functioning correctly. A full-scale mock-up is valuable in a lobby or restaurant where the mechanical system, viewing distance, and lighting differ from the factory test environment.
Do not seal the top opening to create a sharper architectural line unless the supplied detail allows it. Do not add glass solely because a rendering shows glass. Glass can affect airflow, reflections, access, and condensation; its inclusion and position should be explicitly engineered.
6. Detail support, opening, and finish tolerances
The support should remain level under the operating weight of the appliance and water. Verify the model’s dry weight and water capacity from current documents, then let the project engineer or contractor size the support for the complete assembly and surrounding finishes. Do not use tank capacity alone as the total operating load.
Separate three dimensions in the drawing: the appliance body, the rough opening, and the visible finished opening. They are not interchangeable. Add the finish build-up for stone, metal, tile, board, or joinery; show tolerances and removable panels; and state which party owns final site measurement. If multiple modules form one long effect, coordinate joint lines, level, lighting continuity, service segmentation, and the method for removing one module without dismantling the whole wall.
Complete dusty cutting and grinding before the unit is commissioned. Protect reservoirs, fans, electronics, lights, and mist outlets from construction debris. If the appliance must be placed early, keep protective measures compatible with ventilation and remove them before testing.
7. Design service access before the finish is approved
Service access is not simply an unseen hole. A technician needs a path wide enough to inspect connections, isolate services, remove the relevant component, use tools, and lift parts safely. The access panel also needs a repeatable fixing method so maintenance does not chip stone or distort metal.
Mark access zones on plan and section. Test them against actual part dimensions and removal direction. Ask whether routine work occurs from above, below, front, or an end. Keep valves, filters, plugs, control boxes, and drainage points within reachable distance rather than scattering them behind unrelated fixed finishes.
For commercial interiors, decide whether service can occur while the space is open. A panel behind fixed seating or reception joinery may be technically present but operationally useless. The facilities team should review access before the architect signs off the finish.
8. Commission the complete installation
Commissioning should prove the installed system, not merely show that the LEDs turn on. Begin with the manufacturer’s sequence and local safety checks. Verify model and nameplate, secure and level support, electrical isolation, water connections, valve positions, drain arrangement, reservoir cleanliness, decorative-media placement, controls, and clear airflow. Check for leakage before surrounding areas are handed over.
Run the unit long enough to observe stable mist across the intended length. Check response at each available flame or effect level, lighting operation, remote or app functions included in the order, unusual vibration or noise, and the influence of room air movement. Inspect adjacent finishes for unintended moisture. Record what was tested, by whom, on what date, and any limitation still awaiting correction.
Photograph the open service area before it is closed. Include valve and isolation locations, cable and water routes, filter orientation, drain route, and serial or model identification. Those images can save hours after handover.
9. Hand over operation and maintenance
Give the owner the final quotation, approved drawing, delivered manual, model and serial information, commissioning record, warranty terms, supplier contact, spare-parts list if supplied, and photographs of concealed services. Train the people who will actually operate the unit, not only the construction manager.
The routine should state how to start and stop the effect, fill or isolate water, recognize low water or abnormal behavior, clean approved components, and shut down the system for service. It should also say what staff must not do: add fragrance or chemicals without permission, operate with blocked airflow, force controls, ignore leakage, or use undocumented replacement parts.
Maintenance frequency should respond to water quality, operating hours, dust, and observed performance—not a made-up universal interval. Begin with the delivered manual, record inspections, and adjust the facilities schedule using actual site evidence.
Project sequence: from concept to handover
- Define the intent. Record viewing sides, desired visual length, daily operating hours, location, audience, controls, and maintenance owner.
- Select the exact model. Compare Primary manual-fill and Deluxe automatic-capable configurations using verified current documents.
- Freeze the evidence set. Obtain the quotation, model drawing, electrical data, connection details, accessory scope, and manual revision.
- Coordinate the building. Resolve support, rough and finished openings, power, water, drainage, airflow, finish tolerances, and service access.
- Review locally. Qualified project professionals check applicable electrical, plumbing, building, accessibility, and workplace requirements.
- Inspect before closure. Photograph concealed services and prove access before irreversible finishes are installed.
- Commission and document. Test the complete system under normal room conditions and close outstanding issues.
- Train and maintain. Hand over instructions, evidence, contacts, and a site-specific inspection routine.
Common installation mistakes
- Building the opening from a marketing image or nominal length instead of the exact approved drawing.
- Placing a power connection, valve, or filter where the installed appliance blocks access.
- Choosing automatic fill after the wall and plumbing routes are already fixed.
- Assuming auto-fill includes auto-drain and every pictured accessory.
- Ignoring local water hardness until mist output or cleaning frequency changes.
- Blocking the air intake or mist outlet with trim, glass, decorative media, or temporary protection.
- Locating the feature in a strong supply-air path without a mock-up.
- Providing an access panel that is too small for component removal.
- Closing finishes before leakage checks and commissioning are complete.
- Using an “outdoor” product name as proof of an IP rating, weather exposure, or freeze resistance.
Information to send SEFIRE before installation drawings
Send the project country and city, indoor or proposed outdoor location, room type, wall plan and section, finished opening, desired flame length, viewing distance, finish materials, expected hours of use, manual or automatic water preference, available power, water and drainage routes, control expectations, quantity, and site schedule. Include photographs of the wall or construction zone and identify who will maintain the unit.
For a useful technical response, Allen’s team should also receive the exact questions the architect or contractor needs answered. “Please send all details” is less effective than marking the drawing with connection side, access, tolerance, support, airflow, and removal questions. SEFIRE can then respond against a defined project condition and identify information that still requires a project-specific drawing or document.
Frequently asked questions
Does a water vapor fireplace need plumbing?
Not always. SEFIRE’s verified Primary VSFB summary uses manual fill and drain. The Deluxe family supports automatic fill and drain, but the ordered accessories and connections must be confirmed. Manual fill still needs safe tank and service access.
Does it need a drain?
It needs a controlled way to remove water for cleaning or service. Whether that is a removable reservoir, manual drain, or connected automatic drain depends on the exact product and quotation. Do not add a site drain connection without the approved detail.
Can I use tap water?
Follow the exact delivered manual. Local hardness matters because minerals can create scale, but a general web article cannot prescribe one water type for every model and market.
Can the fireplace sit below a television?
Potentially, because a mist effect is different from a real flame, but the team must still coordinate moisture, optional heat, airflow, cable routes, viewing height, manufacturer instructions, and service access. See the dedicated TV and water vapor fireplace planning guide.
How much access space is required?
There is no responsible universal number. Use the exact model drawing and confirm that the panel allows routine service and removal of the largest serviceable component.
Can a water vapor fireplace be installed outdoors?
Only when the exact configuration has documented outdoor suitability and the site design addresses weather, drainage, electricity, wind, maintenance, and seasonal conditions. SEFIRE’s local editorial source does not establish a universal IP rating, so request that evidence for the quotation.
Related SEFIRE resources
- Compare SEFIRE water vapor fireplace families
- Primary vs Deluxe: manual and automatic water-system choices
- Choose a water vapor fireplace size
- Decide when automatic filling is worthwhile
- Plan water quality and mineral-residue control
- Build a cleaning and maintenance routine
- Use the cross-product installation planning checklist
- Prepare a complete project brief
Primary external references
- Dimplex Opti-myst owner’s manual — an example of model-specific electrical, plumbing, shutoff-access, and water-quality instructions.
- U.S. Consumer Product Safety Commission: Extension Cords — public guidance on characteristics connected with shock and fire risk.
- U.S. EPA WaterSense guide to water softeners — current primary guidance explaining hard-water scale effects on plumbing and appliances.
Editorial note: prepared from SEFIRE’s locally verified 2026 product-fact file and the primary sources above. Technical review date: July 22, 2026. Corrections or model-document requests: sales@sefireplace.com.
Planning a built-in mist fireplace?
Send the model or desired length, wall section, finishes, services, country, quantity, and maintenance plan. SEFIRE can identify the product documents and project-specific decisions required before construction.
Send a Project Brief